Access, Footing, and When You Stay at the Hatch
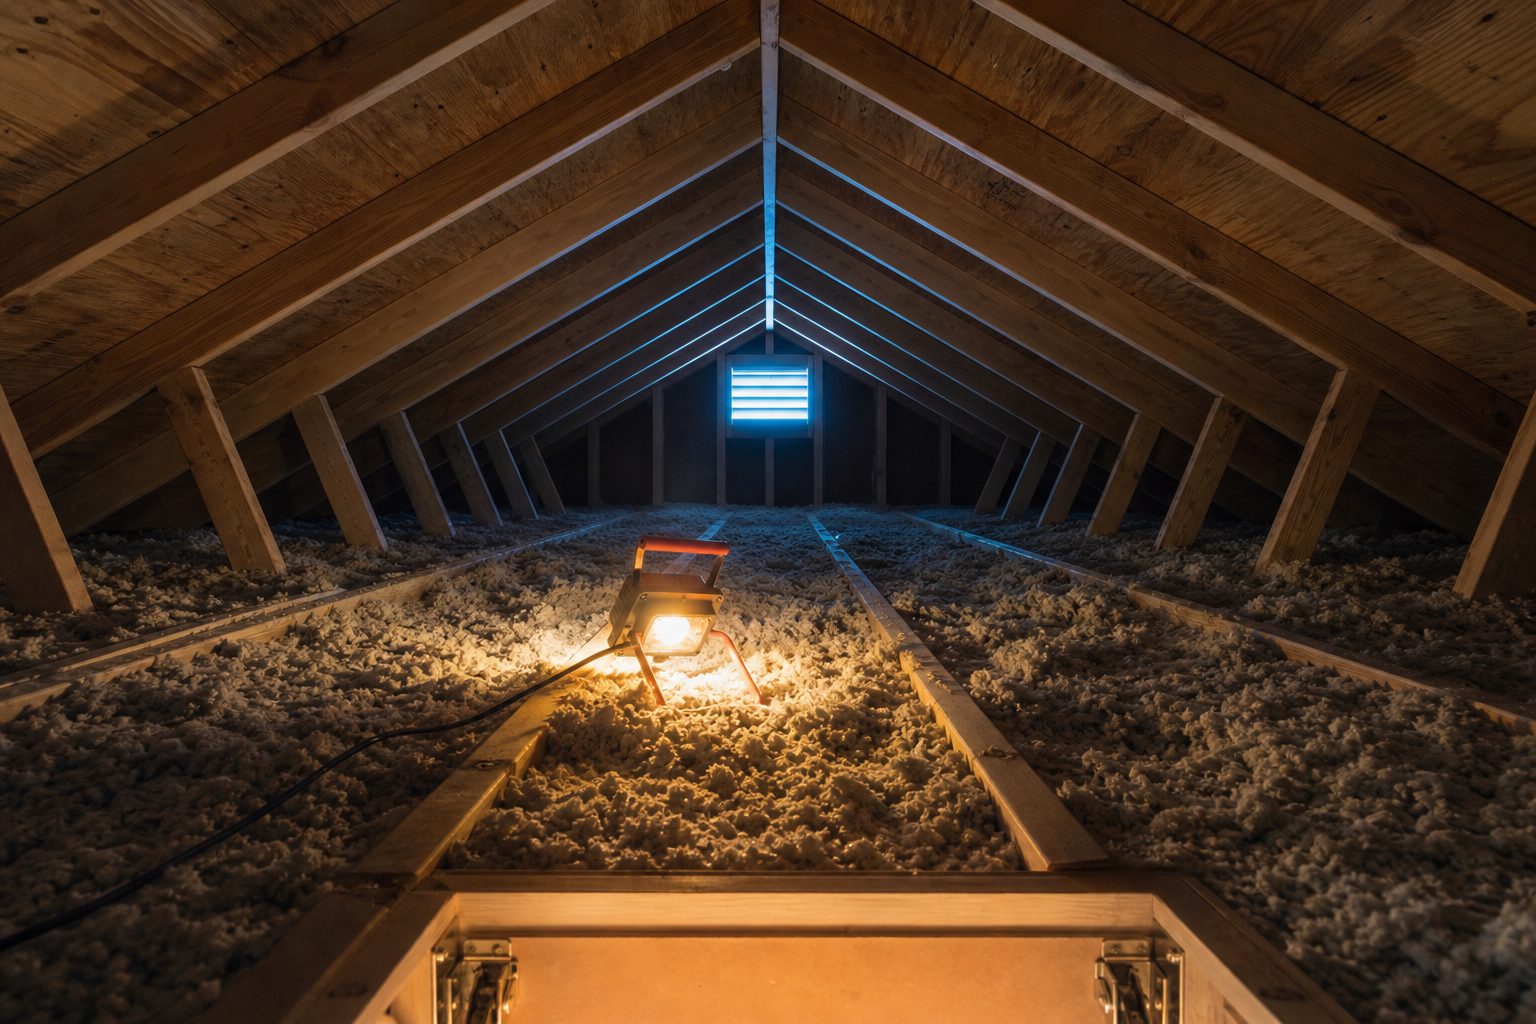
The attic tells its story only if you can get to it. Always document the attic access: is it a pull-down ladder, a scuttle, or a walk-in? Take a photo before you enter, including the clearance around the opening and any obstacles. For many homes, access is a closet ceiling hatch or hallway panel. Watch for shelving, stored items, or low steps that might make entry unsafe. If you cannot physically enter due to insulation, stored items, or structural hazards, note this clearly in your report and photograph the reason.
Once inside, footing is critical. Trusses and ceiling joists are your only safe path. Never step on drywall or between framing members. Bring a bright flashlight and watch for nails protruding from the roof deck. If insulation is deep, probe with a stick or your hand to confirm footing before you commit your weight. In attics with minimal headroom or tight framing, you may need to stay at the hatch. Use a telescoping camera, or photograph with your phone extended, but always document the limits of your inspection in writing and with photos.
Keep reading: What One Inspection Costs You: Building a Per-Job Cost Model
Net Free Vent Area: The 1/150 and 1/300 Ratios
Attic ventilation is not guesswork. Most codes require one square foot of net free vent area for every 150 square feet of attic floor. Some allow 1 square foot per 300 square feet if there is a vapor barrier or if the vents are split evenly between intake and exhaust. Net free vent area is the actual open area after screens and louvers are considered, not the size of the vent opening itself.
Check for gable, soffit, and ridge vents. Take photos of all vent types and count them. If the attic floor measures 1,500 square feet and the code requires 1/150, you need 10 square feet of net free vent area. Most vent products stamp the net free area on the underside. Record these numbers, add them up, and compare to what is required for the attic's size. If venting is short, call it out and document it with images.
Intake and Exhaust Balance and the Mixed Vent Trap
Balanced airflow is key. Intake vents, usually soffits or eave vents, bring in cool air, while exhaust vents, like ridge or gable vents, let hot air escape. More exhaust than intake can depressurize the attic, drawing conditioned air from the living space and pulling moisture with it. Photograph soffit venting from both inside and outside. On the inside, look for daylight at the eaves or baffles that keep insulation from blocking airflow. On the exterior, note if soffit vents are painted shut or clogged with insulation.
Mixed vent types can create problems. If a power fan or gable vent is combined with a ridge vent, air can be pulled in through the ridge, short-circuiting the system and leaving some attic areas stagnant. Document every vent type visible. Note if there is a ridge vent with gable vents or powered fans. Record any visible baffles or chutes that protect soffit vents from insulation. Point out any evidence of improper vent mixing, and add a clear photo showing the arrangement.
Insulation Depth, Coverage Gaps, and Compressed Batts
Insulation is your second stop. Measure depth with a ruler or marked stick. Photograph the stick in the insulation as proof. Note the insulation type: fiberglass batts, blown cellulose, spray foam, or mineral wool. Most climates call for between 10 to 18 inches of insulation, but check the local standard. Uniform depth is as important as thickness. Gaps, voids, or uneven layers reduce effectiveness.
Coverage issues appear around eaves, at the edge of attic decking, and where ducts or wiring cross the floor. Photograph any gaps, voids, or thin spots. Compressed batts are common where storage has been added or where insulation is squeezed under walkways. Compression cuts the R-value, sometimes by half. Record and photograph all compressed areas. If insulation is loose or displaced near the hatch, baffles, or mechanical equipment, show this in your report.
Keep reading: Field Report: Inspecting a Post-Tension Slab in Expansive Clay
Bath and Dryer Exhaust Terminating Inside the Attic
No exhaust fan or dryer should ever terminate inside the attic. Humid air from bathrooms or dryers deposits moisture on framing and insulation, leading to mold and rot. Verify that ductwork from bath fans and dryers runs to an exterior wall or roof vent. Photograph the duct path, the termination point, and any visible moisture stains or lint deposits. If the duct ends inside the attic, document with both a wide shot and a close-up.
Common problems include flexible ducts that sag or disconnect, vent pipes that stop short at the eave, or dryer vents that spill lint into the insulation. If you see metal or plastic ducting that disappears under insulation and does not exit, trace it as far as you can. Use a moisture meter near the discharge if there are visible stains. Note any evidence of mold or mildew, and document with clear photos for your report.
Framing: Cut Rafters, Modified Trusses, Truss Uplift, Sistering
The framing holds the story of every alteration and every roof load. Start with a look at the rafters or trusses. Cut or notched rafters weaken the structure. Photograph any cuts, notches, or holes drilled in the top or bottom third of rafters or truss members. Most trusses are designed to work as triangles; even small changes can compromise their strength.
Modified Trusses
Homeowners may cut trusses to create storage or install HVAC equipment. Look for field modifications: missing webs, added plywood, or metal plates that do not match the original hardware. Photograph the entire truss and the specific modification. If the attic is finished or partially floored, look underneath for evidence of removed support members.
Truss Uplift
Truss uplift shows as cracks at the ceiling corners below the attic. In the attic, look for truss members that have pulled up from the top plates or left gaps at the bearing points. Document any hardware intended to allow movement, and note if the truss appears to have shifted or bowed. Take wide and close-up shots for your report.
Sistering
Sistered rafters or ceiling joists, where a new board is fastened alongside an old one, are usually installed to reinforce a damaged member. Note if the sistered piece runs full length or is only a partial repair. Document all sistering with clear photos, and record any visible fasteners or hardware.
See how SlabToRoof handles this for home inspection
Moisture Evidence: Sheathing Stains, Frost, and Rusted Nail Points
Moisture leaves a trail in the attic. Start with the underside of the roof sheathing. Stains or dark marks may indicate past leaks, especially around chimneys, valleys, or penetrations. Photograph every stained area, and note if the wood is soft or shows active water. In cold climates, frost may appear on sheathing or nails during winter. On warmer days, this frost melts and soaks the insulation or framing below. Record any frost or water droplets you find, as well as the conditions present during your inspection.
Rust on the points of nails is a sure sign of chronic humidity. Photograph clusters of rusted nail tips. If insulation directly beneath these areas is discolored or matted, this points to condensation from warm, moist air escaping from the living space. Look for mold growth on the sheathing or framing, and document with photos and notes on musty odors or visible spores.
Always note any active drips, pooled water, or wet insulation. Be sure to check under vent pipes, around skylights, and at low points in the roof framing. Use a moisture meter to confirm if an area is wet or just stained from a past event.
Wiring, Open Junction Boxes, and Knob and Tube Buried in Insulation
Attics are a common place for electrical shortcuts. Look for open junction boxes: any box without a cover or with exposed splices. Photograph and note every open box, as this is a safety hazard. Newer wiring should be run above the insulation, stapled to framing, and never buried. If you see loose cables lying on the insulation, take a photo and describe the risk of overheating or rodent damage.
Knob and tube wiring is still present in many older homes. It is not rated for contact with insulation. If you find porcelain knobs, tubes, and old cloth wire, check if it is surrounded or covered by insulation. Document these conditions carefully. Call out any splices between knob and tube and modern wiring, and photograph all connections. Note if wiring appears brittle, frayed, or altered.
Finally, check for any signs of past electrical work: added light fixtures, non-metallic cable spliced into older circuits, or missing covers. Every electrical defect should be photographed in context, showing both the location and the detail of the issue.
Assembling the Evidence: Fast, Clear, and Delivered Same Day
An attic inspection can reveal defects that affect comfort, safety, and resale value. The real test for a home inspector is assembling this evidence in a way that is clear and useful to both agents and buyers. Every photo should tell a part of the story. Annotation helps make the key points stand out. Same day delivery, with your branding, meets the expectations of agents and clients who want answers before the deal moves forward. A tool that builds reports, lets you mark up photos, and sends branded copies to all parties makes this process faster and keeps your workflow organized.